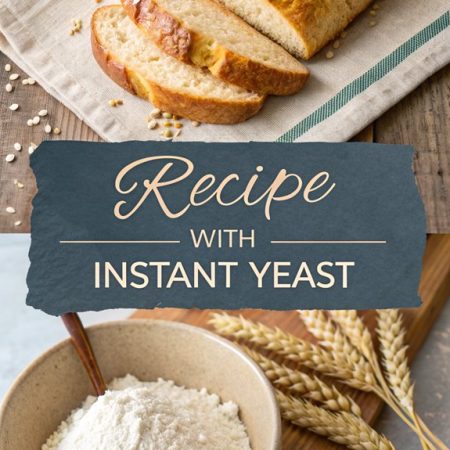
Recipe With Instant Yeast
Using instant yeast in your baking is both efficient and easy. Here’s a simple recipe to try: Combine 1 ⅓ cups of lukewarm milk and 6 tablespoons of melted butter. In another bowl, whisk together 4 cups of bread flour, 2 tablespoons of sugar, and 1 ½ teaspoons of instant yeast. Gradually mix the dry ingredients into the milk mixture until dough forms. Knead on a floured surface for 5-7 minutes until smooth, then let it rise in a warm place for about 30 minutes. This method yields soft, flavorful bread perfect for sandwiches, and there’s plenty more to explore.
Key Takeaways
- Instant yeast allows for faster baking by skipping the proofing step, making recipes easier and quicker.
- Combine lukewarm milk and melted butter before mixing with dry ingredients for optimal results.
- Use bread flour to enhance the structure and texture of your baked goods.
- Knead the dough for 5-7 minutes until smooth, then let it rise for about 30 minutes.
- Store instant yeast in a cool, dry place to extend its shelf life up to two years.
Why You’ll Love this Recipe
When you try this recipe, you’ll quickly appreciate how instant yeast transforms the baking experience. Its benefits simplify your time in the kitchen.
- Faster Preparation: You don’t need to proof or dissolve it, saving time.
- Simpler Usage: Mix it directly with dry ingredients for easy incorporation.
- Reduced Steps: Skipping the rehydration step means fewer complications.
- Consistent Results: Expect reliable performance due to its high activity level and finer texture. Instant yeast begins working almost immediately after mixing, providing an efficient rise.
- Versatility: It works well in various bread types, from quick breads to more complex recipes.
These features make baking more enjoyable.
You’ll find that instant yeast allows you to focus on the fun parts of baking, creating delicious bread with less stress.
Recipe
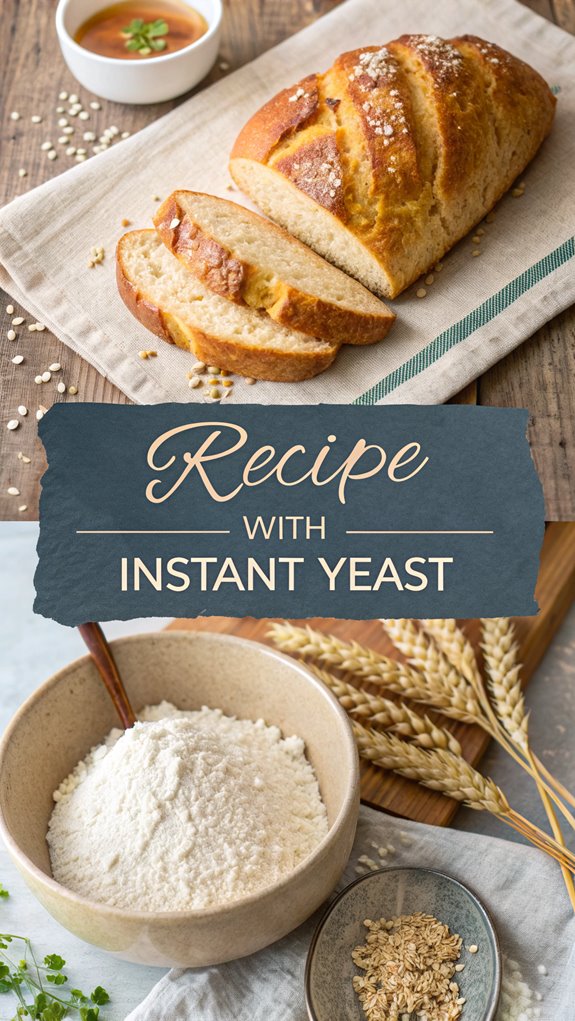
Recipe With Instant Yeast****
Making bread at home can be a delightful experience, especially when using instant yeast. This method allows you to skip the proofing step, making the process quicker and more efficient. Instant yeast can be added directly to the dry ingredients, leading to a perfectly risen loaf without the hassle of waiting for the yeast to activate. This recipe will yield a soft and flavorful bread that’s perfect for sandwiches or simply enjoying with butter. To achieve the best results, it’s important to use the right ingredients and follow the steps carefully. The use of bread flour instead of all-purpose flour will give your bread a better structure and texture. Ensure that your milk is lukewarm, as this temperature helps the instant yeast work effectively. With just a few simple steps, you’ll have homemade bread that you can be proud of.
Additionally, using fresh ingredients will enhance the overall flavor of your bread and help achieve optimal results.
Ingredients:
– 1 1/3 Cups lukewarm milk (307 milliliters)
– 6 Tablespoons unsalted butter (86 grams)
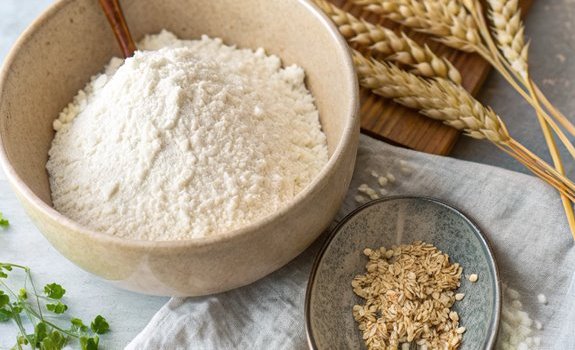
– 4 Cups bread flour (480 grams)
– 2 Tablespoons white granulated sugar (25 grams)
– 1 1/2 Teaspoons instant yeast (4.5 grams)
Cooking Instructions:
1. In a large mixing bowl, combine the lukewarm milk and unsalted butter. Stir gently until the butter is melted and the mixture is well combined.
2. In a separate bowl, whisk together the bread flour, sugar, and instant yeast. Ensure that the yeast is evenly distributed throughout the flour mixture.
3. Gradually add the dry ingredients to the milk and butter mixture, stirring until a dough begins to form.
4. Knead the dough gently on a floured surface for about 5-7 minutes until it’s smooth and elastic. Be careful not to over-knead.
5. Place the kneaded dough in a lightly greased bowl, cover it with a clean cloth, and let it rise in a warm place for approximately 30 minutes, or until it has doubled in size.
6. Preheat your oven to 350°F (175°C).
7. Once the dough has risen, punch it down gently to release any air bubbles. Shape the dough into a loaf and place it in a greased loaf pan.
8. Allow the shaped dough to rise again for about 15-20 minutes, or until it has risen slightly above the edge of the pan.
9. Bake the bread in the preheated oven for 40 minutes, or until the top is golden brown and it sounds hollow when tapped.
10. Remove the bread from the oven and let it cool in the pan for a few minutes before transferring it to a wire rack to cool completely.
Extra Tips:
When baking bread, it’s important to allow the dough to rise in a warm environment, as this encourages yeast activity. If your kitchen is cool, you can preheat your oven for a minute and then turn it off, using it as a warm place for the dough to rise.
Additionally, storing the cooled bread in a bread box or a sealed plastic bag will help maintain its freshness for several days. Enjoy your homemade bread warm or toasted!
Final Thoughts
Using instant yeast can transform your baking experience, making it quicker and more straightforward. Here are some key points to remember:
- Storage: Keep instant yeast in a cool, dry place, ideally in the refrigerator or freezer.
- Shelf Life: It lasts up to two years if stored properly.
- Substitution: You can use it 1:1 for active dry yeast in recipes.
- Usage: Mix it directly with dry ingredients; no proofing needed.
- Rise Time: Requires only one rise, speeding up the process. Instant yeast is particularly beneficial for high-hydration doughs, making it a favorite among many bakers.
With its reliability and versatility, instant yeast simplifies baking. It’s cost-effective, and you can store it long-term.
Always check expiration dates and keep opened yeast sealed for best results. Enjoy baking with this convenient ingredient!
Frequently Asked Questions
Can I Substitute Instant Yeast With Active Dry Yeast?
Yes, you can substitute instant yeast with active dry yeast. Just remember to use 1.5 times the amount, and allow for a longer rise time. Proofing isn’t necessary if you use warm water.
How Should I Store Leftover Instant Yeast?
To store leftover instant yeast, keep it in an airtight container in the refrigerator for up to four months or freeze it for up to a year. Always label it with the opening date.
Does Instant Yeast Need to Be Proofed Before Use?
Did you know instant yeast has a longer shelf life than active dry yeast? You don’t need to proof instant yeast before use, but doing so can reassure you of its activity.
What Is the Shelf Life of Instant Yeast?
Instant yeast lasts up to two years when stored properly. Keep it in an airtight container away from heat and moisture. For longer shelf life, consider refrigerating or freezing it to maintain its effectiveness.
Can I Use Instant Yeast in Gluten-Free Recipes?
Yes, you can use instant yeast in gluten-free recipes. It dissolves quickly, requires no proofing, and reduces rising time. Just monitor your dough closely to avoid overproofing for the best results.
Recipe With Instant Yeast
Ingredients
- - 1 1/3 Cups lukewarm milk 307 milliliters
- - 6 Tablespoons unsalted butter 86 grams
- - 4 Cups bread flour 480 grams
- - 2 Tablespoons white granulated sugar 25 grams
- - 1 1/2 Teaspoons instant yeast 4.5 grams
Instructions
- In a large mixing bowl, combine the lukewarm milk and unsalted butter. Stir gently until the butter is melted and the mixture is well combined.
- In a separate bowl, whisk together the bread flour, sugar, and instant yeast. Ensure that the yeast is evenly distributed throughout the flour mixture.
- Gradually add the dry ingredients to the milk and butter mixture, stirring until a dough begins to form.
- Knead the dough gently on a floured surface for about 5-7 minutes until it's smooth and elastic. Be careful not to over-knead.
- Place the kneaded dough in a lightly greased bowl, cover it with a clean cloth, and let it rise in a warm place for approximately 30 minutes, or until it has doubled in size.
- Preheat your oven to 350°F (175°C).
- Once the dough has risen, punch it down gently to release any air bubbles. Shape the dough into a loaf and place it in a greased loaf pan.
- Allow the shaped dough to rise again for about 15-20 minutes, or until it has risen slightly above the edge of the pan.
- Bake the bread in the preheated oven for 40 minutes, or until the top is golden brown and it sounds hollow when tapped.
- Remove the bread from the oven and let it cool in the pan for a few minutes before transferring it to a wire rack to cool completely.